
Sunday, August 26, 2012

Saturday, August 25, 2012


Friday, August 24, 2012
A Poem by Jorge Luis Borges
You Learn
After a while you learn the subtle difference
Between holding a hand and chaining a soul,
And you learn that love doesn’t mean leaning
And company doesn’t mean security.
And you begin to learn that kisses aren’t contracts
And presents aren’t promises,
And you begin to accept your defeats
With your head up and your eyes open
With the grace of a woman, not the grief of a child,
And you learn to build all your roads on today
Because tomorrow’s ground is too uncertain for plans
And futures have a way of falling down in mid-flight.
After a while you learn…
That even sunshine burns if you get too much.
So you plant your garden and decorate your own soul,
Instead of waiting for someone to bring you flowers.
And you learn that you really can endure…
That you really are strong
And you really do have worth…
And you learn and learn…
With every good-bye you learn.
Thursday, August 23, 2012
BBS 8.0 - Yosamitesa
The starting F8 was "Thing 1 and Thing 2" from Dr. Seuss.
I'm not sure what to call the block - maybe Pinwheel Weave?

Monday, August 20, 2012
BBS 8.0 - Moonrise
I'm a member of QuiltingBoard.com and frequently participate in the swaps.
I've got quite a few getting ready to start and today I got my first package for the Boomerang Block Swap 8.0.
The basic premise is this:
Each member sends every other member a fat eighth (F8) of fabric.
A F8 measures approximately 11" x 18".
Using that F8 and their own added materials, each member makes a block of their own choosing and sends it back to the original sender.
You can request certain colors or styles of fabrics but you cannot request a certain style of block.
All blocks must be 12.5" when mailed back.
This is the fabric I got in the mail today:

And this is the block I'm mailing back tomorrow:

The pattern is called "Paths & Stiles."
I'm trying not to let the fabric sit around since I've got time to work on the
blocks now. A week from today (when school starts back up) my schedule is going to be considerably more crowded - so I'm doing what I can while I can.
A Second Cutting Tutorial
So, remember this tutorial about how to cut?
I mentioned that I had a method for cutting pieces larger than your ruler.
Allow me to demonstrate that method.
I'm jumping to the point in the last tutorial where you had already ironed the fabric, folded it selvage to selvage and creased the bottom, and squared up one side of the fabric.
I have also already done the flip/rotate maneuver so that my squared edge is on my left hand side.

Now, I needed to cut a 17.5" wide strip.
The problem? My ruler is 8.5" wide.

The solution is to use 2 rulers.
What I do is this:
First, start with the math. In this situation, I have an 8.5" wide ruler. I need a total of 17.5".
So, 17.5" - 8.5" = 9".
I take a second ruler (in this case, it's my 15" square ruler) and line it up on the squared side of the fabric.

*A note: when you are using 2 rulers, it really only matters if one is the full length of the fabric. In this case, the 8.5" ruler is going to be my "cutting" ruler.
So, now I carefully position my 8.5 x 2" ruler against the 15" square ruler.
Make sure there are no gaps between the rulers.
Double check you are still perfectly lined up on the squared edge of the fabric.
At this point, you can remove the first ruler (in this case, the 15" square ruler) and focus on the cutting ruler.
Now my cutting edge is at the measurement I need and I can finish cutting the fabric with my rotary using the technique I demonstrated before.

I have found that the key to using this method is to make absolutely sure your rulers are not slipping around on the fabric.
This, especially, is where those True Grips circles come in handy. (You can see them all over the place on both my rulers).
Remember, take your time to line things up correctly. If things don't look right, pick the rulers up, walk away, and try again in a few minutes.
It's a pain to mess up a 1.5" strip. It's a gigantic catastrophe to mess up a 17" or 21" or 36" strip.
Sunday, August 19, 2012
A Pinterest Win!
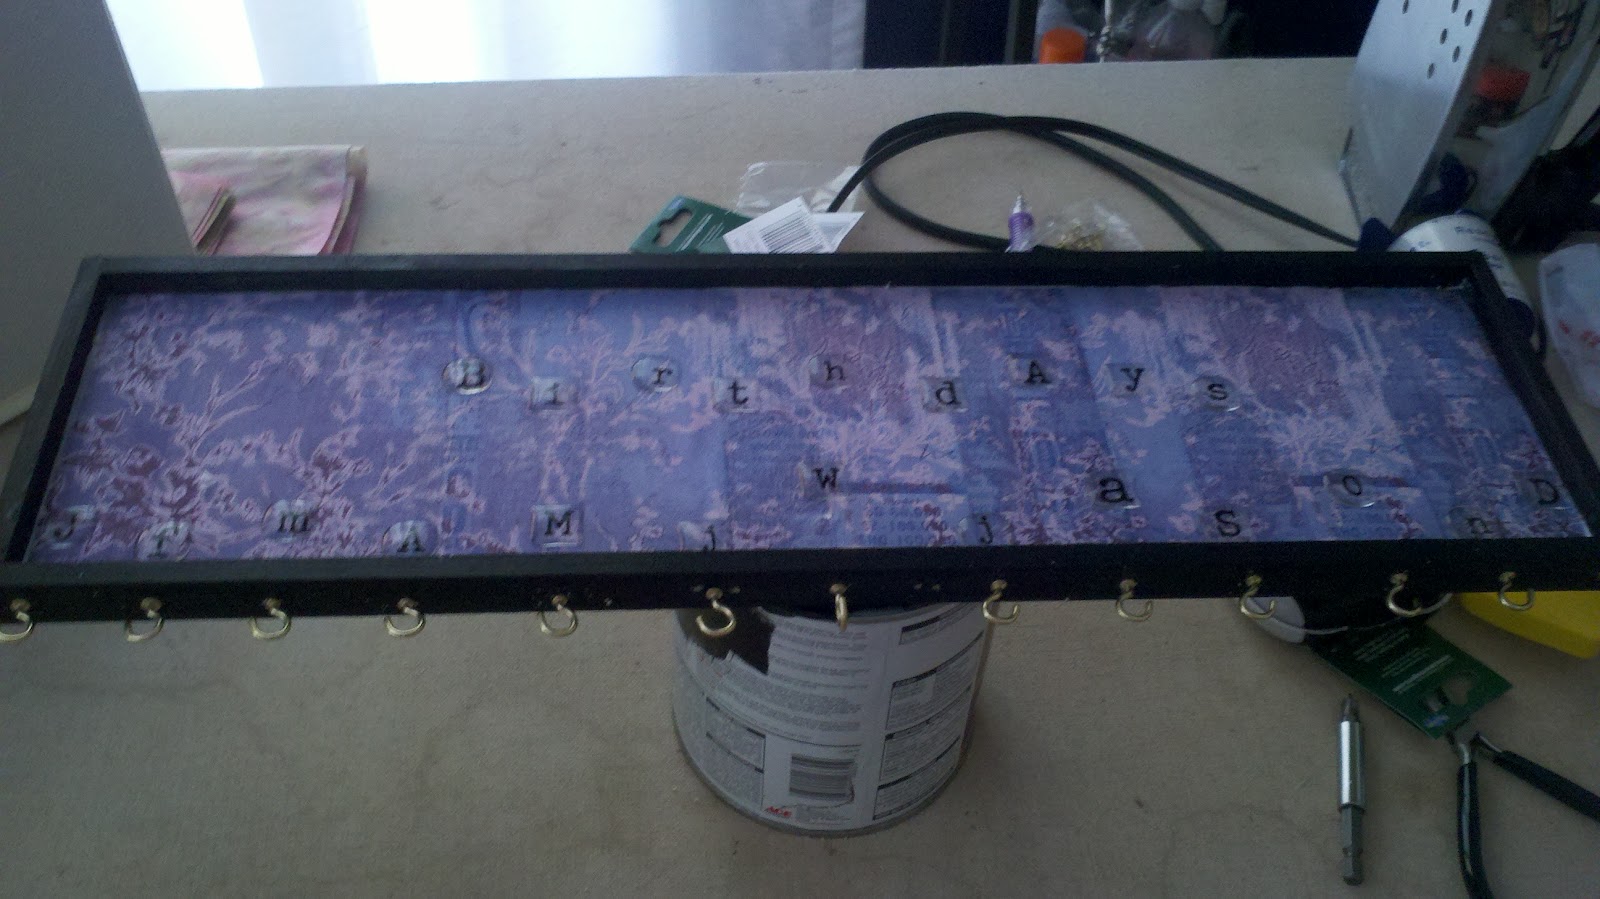
So, based on this pin on Pinterest (click to follow me), I made my own birthday board dangly tracker thing.
Yes, that's an official name.
I started off at Michaels. I found a wooden board that was more or less already framed for about $4.99. It even had hangers on the back.
So I painted the frame part with black high gloss.
I cut some scrap book paper to fit inside the "frame" part of things and glued it down with Elmers. I had some trouble with the paper buckling up around the edges. I just kept pushing it down and eventually the paper gave up fighting back.
I predrilled 13 holes at the bottom. Why 13? We'll get there.
In those holes, I screwed in little gold screw hook things. I made the first six point one way, the middle points forward, and the last six point the opposite direction as the first six.
Then, I stuck letters for each month above the hooks. If I had been thinking a little better, I would have stuck the stickers first and THEN drilled. Why? The spacing is a little uneven, to say the least.
And then I put stickers across the top saying "Birthdays."
Now, for that 13th hook: I made a spot in the center (between June and July) to hang people we're waiting on. As in babies that haven't quite made it out yet. I put a "W" at the top... for waiting.
I couldn't find any circular (or even different shapes) that would work out, so I bought a 1" circular paper punch and punched holes out of scrap book paper.
I used a tiny pin-hole punch to make a hole at the top and bottom of each circle. I wrote names and dates (numbers only) on each tag and then connected them using oval shaped jump rings.

Doogie said, "What a great idea. Now I know who to send cards to."
Yes, because I know he spends SOOO much time stressing out about when everyone's birthday is about to happen so the cards can get in the mail on time.
Including the tools I had to buy (those freaking punches are expensive!!! I know why Martha Stewart is so damn rich!), the total cost for this project was probably in the $40-$50 range. But, if I were to make another as a gift or something, I'd only have to buy another wooden board.
I am considering adding in important anniversaries and putting them in some kind of contrasting color. But then, the only anniversary I really give a crap about is my own and I already know that date.
Sunday, August 5, 2012
I'm not the only artistic one in this family
Midget won ribbons at the 2012 Montana State Fair!
First Place: Midweek Original Design

Third Place: Midweek Modified Kit

Super Awesome Midget!

Wednesday, August 1, 2012
A (Different) Wedding Quilt
A friend and I are splitting the block construction for this quilt.
Here's the math:
25 blocks
1 block = 9x9 grid = 81 squares
That is 2,025 2" squares to cut, fuse, and sew.
Thankfully, we're using QuiltFuse.
It has built-in grids.
Here are my first 3 blocks (fused, not sewn):


Subscribe to:
Posts (Atom)